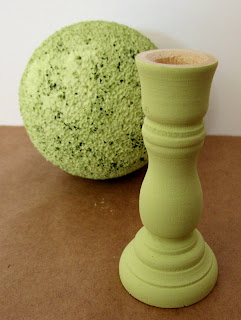
 For the first time in a long time, I find that I am tired of the colors of winter. Usually, I love the stillness of winter, but this year, I am anxious for Spring. Maybe it is updating the Etsy store with Spring and Valentine's products, but I need something some color besides browns and grays. So I decided to share with you a new tutorial so that you can bring a little spring into your winter.
 What you'll need:
Small styrofoam balls (I bought a package of 6)Glue gun
Small unfinished candlestick base (Again, I bought a package of 6)
Foam brush
Acrylic paint
Glass head straight pins
Cardstock (patterned or plain)
Flower punch (I used a Fiskars flower punch)
Step 1
Sand and paint the base. Paint the sytrofoam ball. Paint the cardstock, using a dry brush method, if you want the flowers to match exactly.Step 2
While all that is drying, start punching out flowers. To give the flowers more texture, I put each one in the palm of my hand and push my index finger into the flower. This turns it into a cup shape. Of course you can buy pre-made flowers instead of punching them. I would just keep them small so that the don't overwhelm the scale of the whole piece.Step 3
Using your glue gun out and but a bead of glue on the top of the candlestick base and glue the painted styrofoam ball onto it.Step 4
Take the glass head pins and use them to to stick the flowers to the styrofoam ball. Start where the ball is glued to the base. Then put them flowers in a random pattern around the ball until it is covered. Make sure that some of the petals overlap with some of them on top of flowers and under other flowers. The piece should not look "perfect."Step 5
Embellish the base with ribbon or jute or just leave it as is.There are lots of variations to this so use your imagination and enjoy.


No comments:
Post a Comment