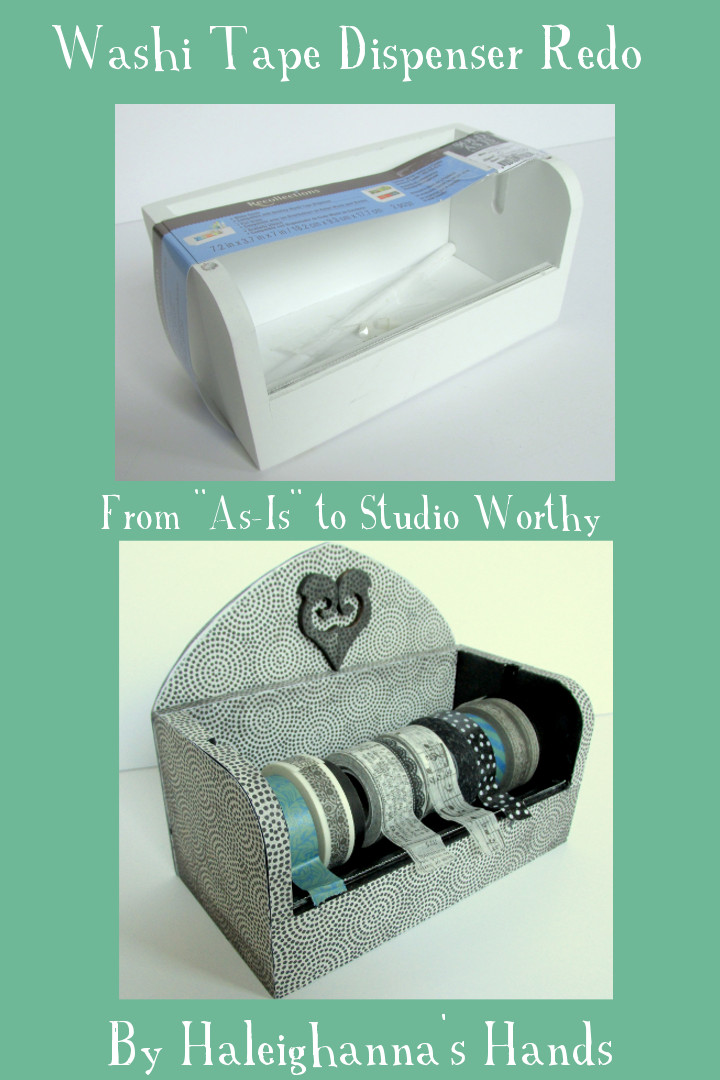
I do love a bargain. Wandering around a craft store, I found a Washi tape dispenser. It was severely marked down with the a warning, "As is." Seeing nothing wrong with it, I decided to grab it. It made the journey to the studio and then sat there. I got a super bargain but now what? White, after all, is my least favorite color. Time for a re-do!
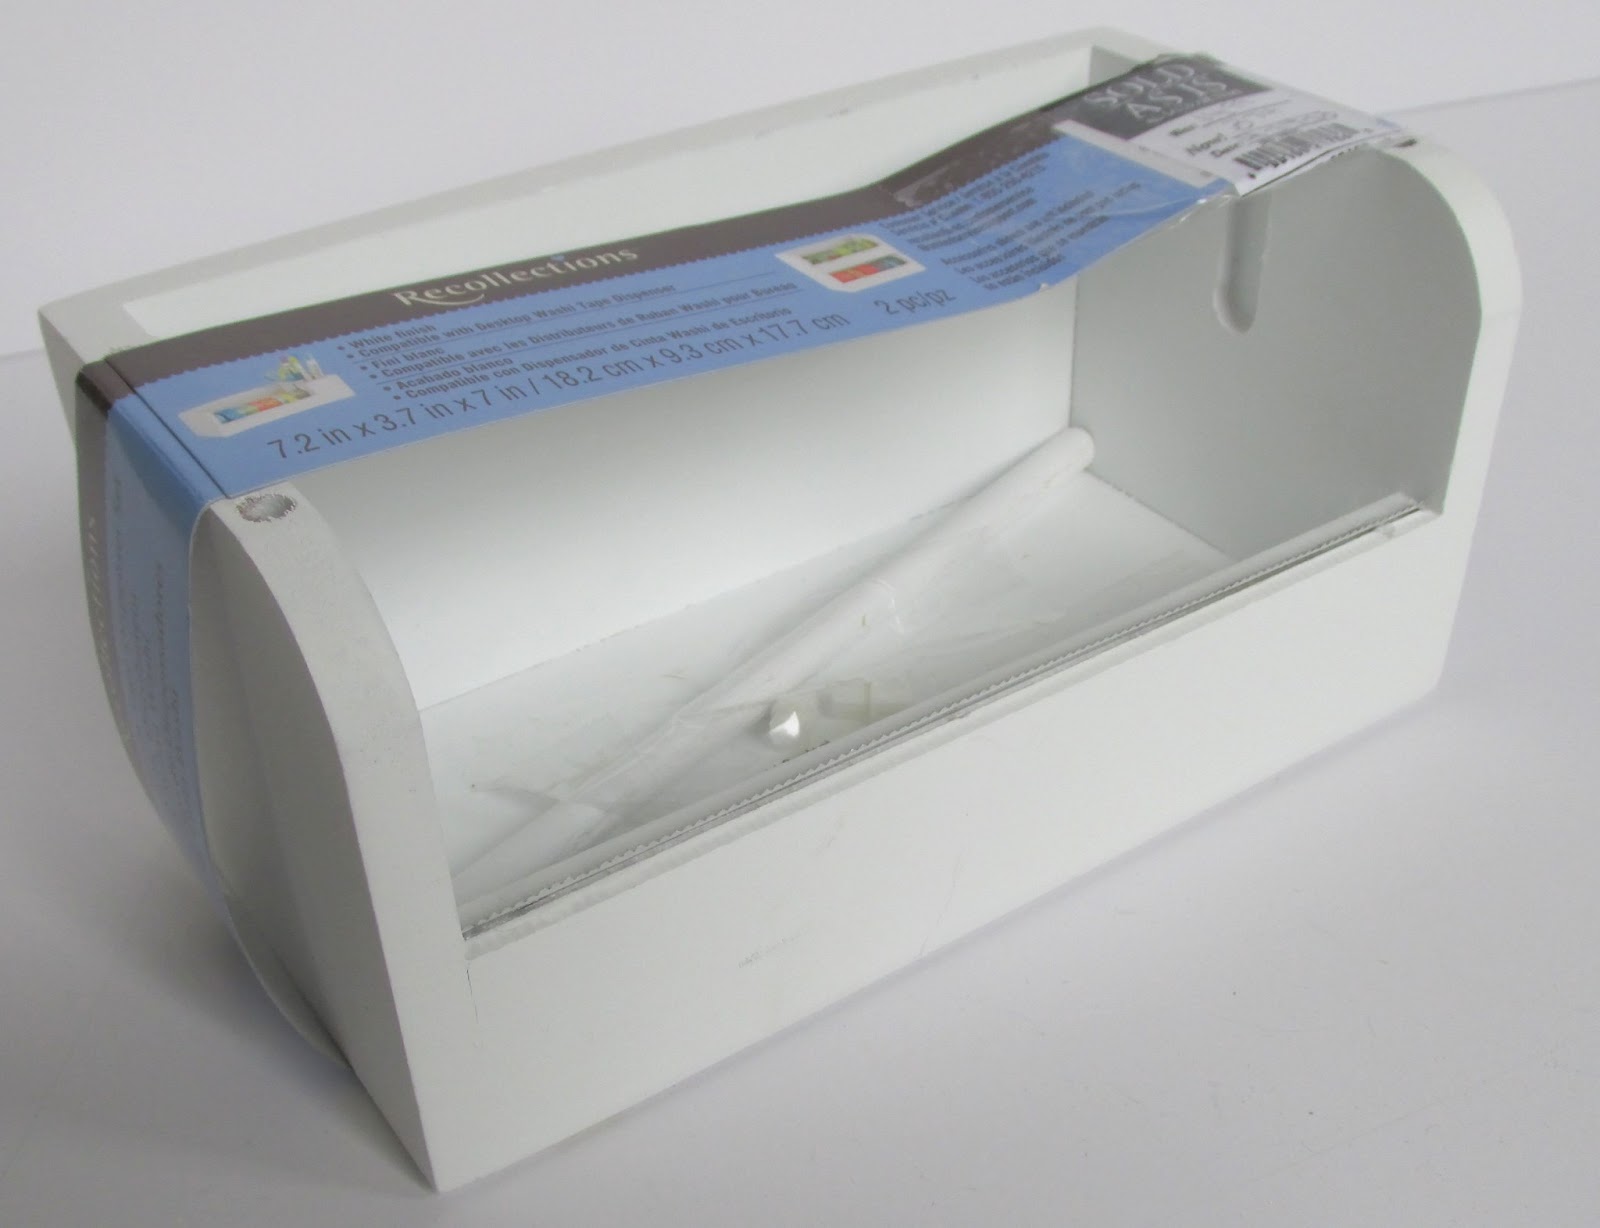
Marked down from $15.00 to $3.50!
I gathered:
- Two pieces of 12 x 12 scrapbooking papers
- Krylon Fushion spray paint
- E6000
- Balsa wood
- Spray adhesive
- Embellishments
- Ranger paint dabbers
- Masking tape
- Craft knife
- Ruler

The top horizontal line is the top of the dispenser.
I wanted to change the shape of the dispenser and personalize it so I bought a piece of Balsa wood. I measured the width of the dispenser and cut the balsa wood to fit. I then laid the dispenser on the Balsa wood and drew a line so show the top so I could see the real estate I had above the dispenser. I found the middle of the piece of wood and drew curves on the balsa wood so that my finished piece would have a cathedral feel. Using the craft knife I cut the curves.

Spray painting was next. I chose Krylon Fusion spray paint in black satin. Since the dispenser had a laminate coating, thought this would adhere best. Plus it dries super fast. I wanted bits of the black to show through around the edges of the paper. You could skip this step if you'd like.

I used masking tape to cover the cutting teeth to keep them sharp.
The spray painting turned out so well, that you might just want to stop here and embellish. I had already picked out scrapbooking pages that I loved so I just pushed on.

Using spray adhesive, I glued the paper to the balsa wood and cut off the excess. I repeated the process so that I had paper on both sides. Then I sanded it a bit.
Using the dispenser as a guide, I traced around the outside of both curved corners on the scrapbooking paper. I cut them out and using E6000 and glued the paper to the dispenser. Then I measured all of the other areas including the back wall of the dispenser. I then cut those pieces out of the paper and glued them with E6000 until I had all the white areas covered. (Remember to hold the paper in place for a bit. This glue needs time to set.)
I had some laser cut pieces and used a scrap of paper and glued it to them. Using a craft knife, I cut around the edges.

I used Ranger Paint Dabbers in Black to add a little contrast.
The back and embellishments were glued and I put books over them and let dry until the next day.
Then, just add your tape!

1 comment:
thanks for this fab idea !
Post a Comment