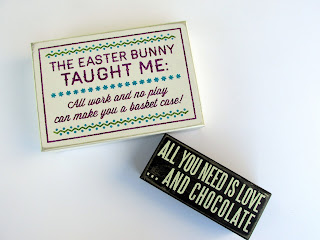
You never know what you will find as you wonder through the world. This mini-pedestal project got its start as I wondered through my local Barnes & Noble. On the super-discount table were these seasonal wood signs covered with glitter and sayings that I had no interest in, but they were really cheap and so they had to go home with me.
They lingered in the studio for a few days before I finally saw their potential: together they could be a mini display pedestal. When I am showing my wares at a craft show, I frequently need small portable display fixtures that have levels. But once I got them done, I thought how lovely they would be on a table, shelf or mantle.
The process is very simple. Here's what you will need...
- Sandpaper or sanding block medium grit
- Wood block signs
- Krylon Fusion Spray Paint
- E6000 Glue (optional)
Step 1: Sanding
Sand. Then sand. Then sand some more. I had to use a lot of elbow grease to get the glitter, glue and painted words off.Step 2: Paint
I chose Krylon Fusion spray paint in black satin. Since the wood seemed to be covered with a plastic coating, I used Fusion just to be safe. Do this in a well ventilated space. Be patient because it will take a few coats.Step 3: Glue
You can use your trusty E6000 to glue the pieces together. This is an optional step. I chose not to glue them because I may want to use just one or two pieces at a time.Wood signs might not be easy to come by so while I did not try this, I think wooden cigar boxes would work as well. I would suggest gluing the lid shut and removing any hardware that would scratch your surfaces.
What fabulous and cheap finds have you found recently and then turned into something fabulous?


No comments:
Post a Comment