Monday, May 13, 2013

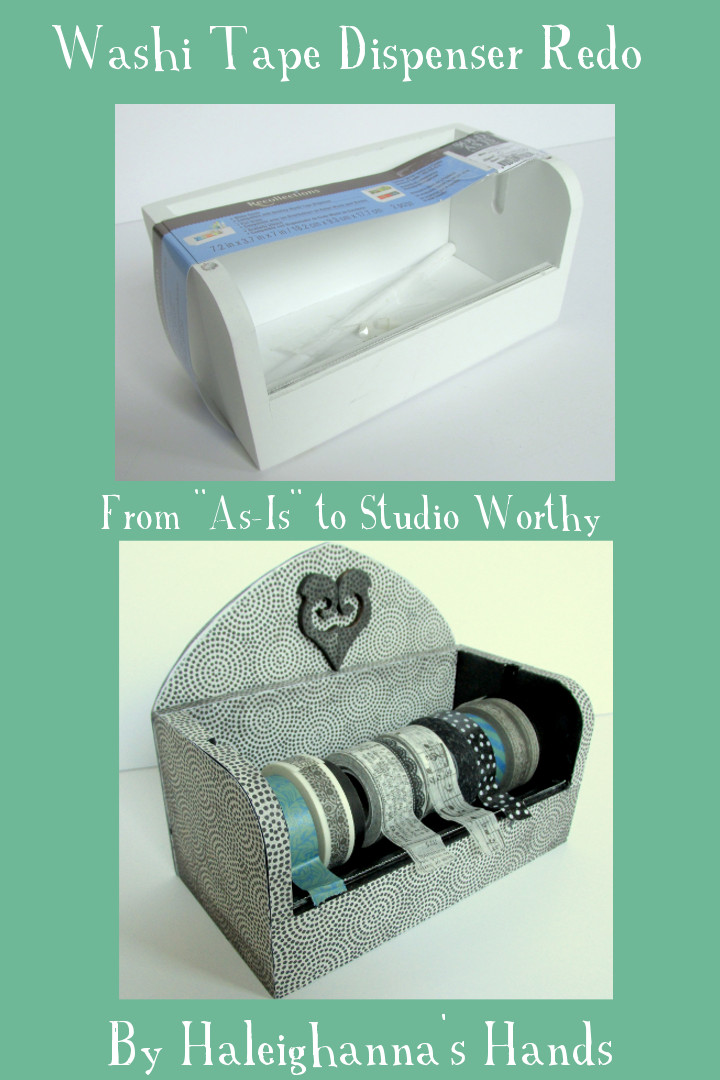
From "As Is" to Studio Worthy!


I do love a bargain. Wandering around a craft store, I found a Washi tape dispenser. It was severely marked down with the a warning, "As is." Seeing nothing wrong with it, I decided to grab it. It made the journey to the studio and then sat there. I got a super bargain but now what? White, after all, is my least favorite color. Time for a re-do!
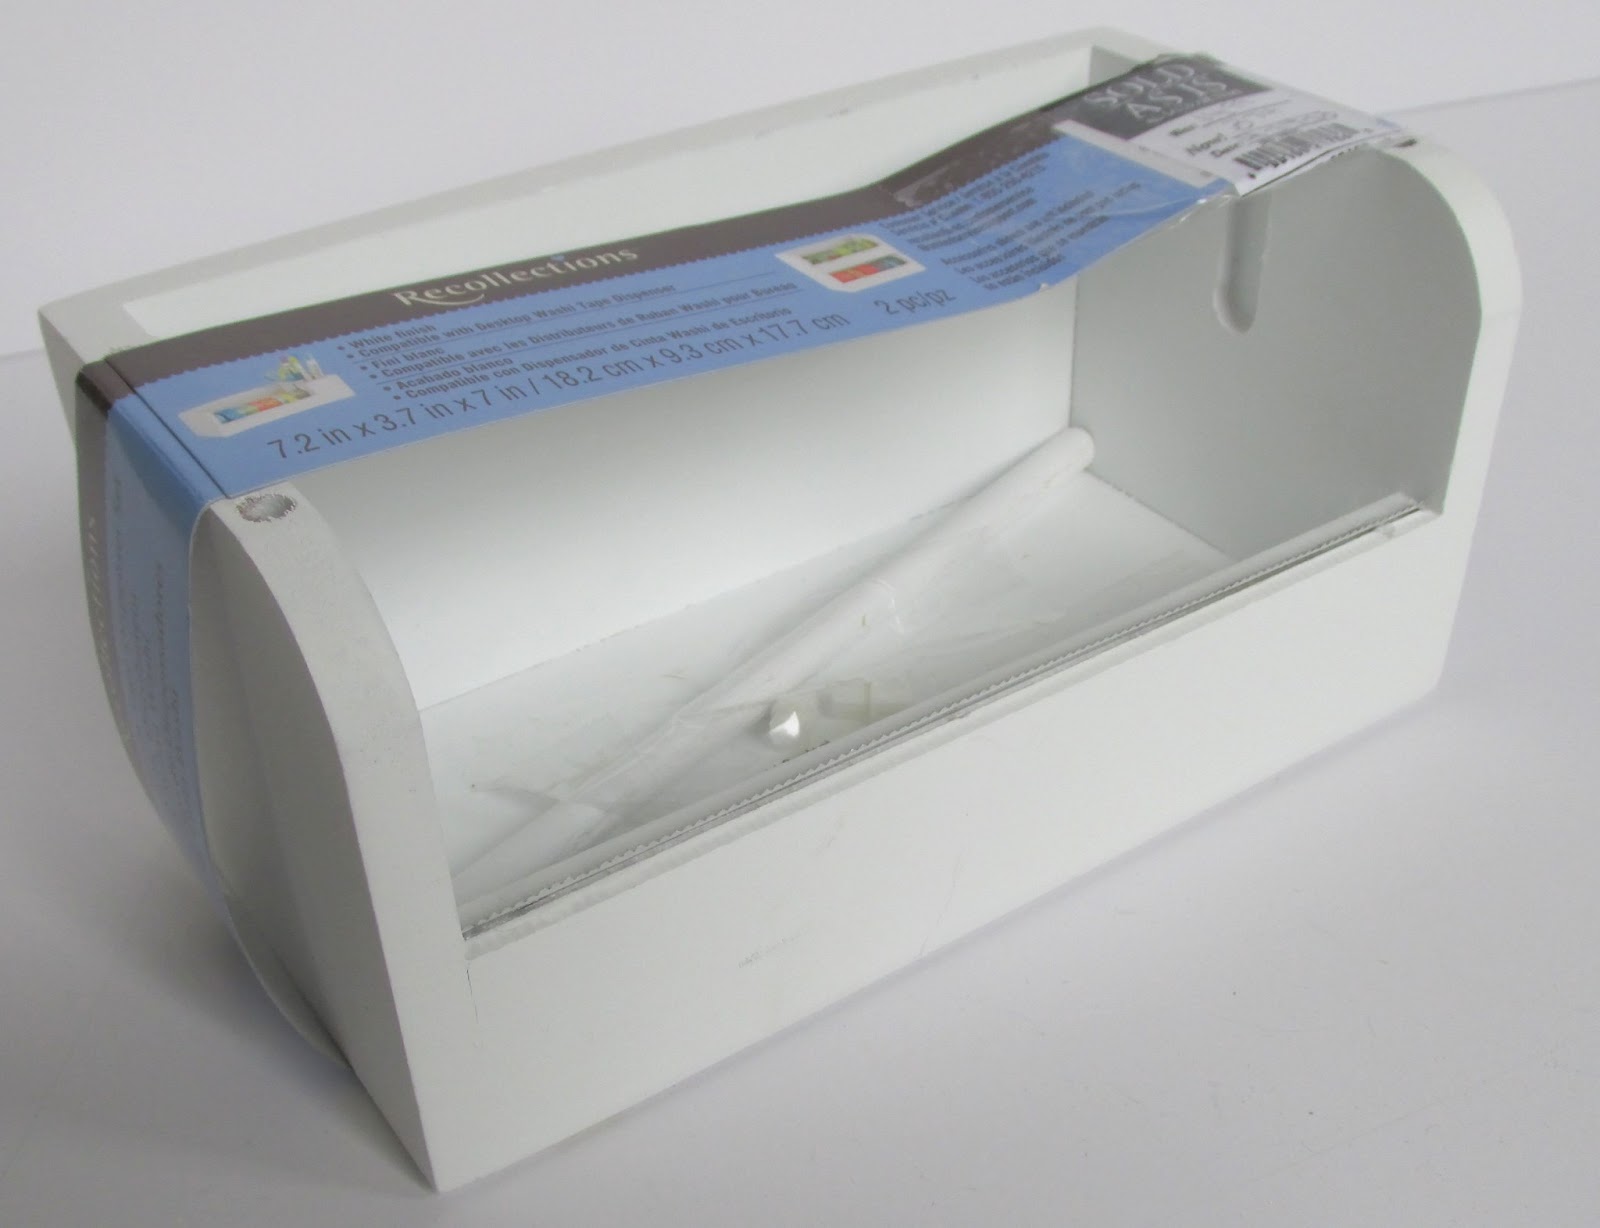
Marked down from $15.00 to $3.50!

I gathered:
  • Two pieces of 12 x 12 scrapbooking papers
  • Krylon Fushion spray paint
  • E6000
  • Balsa wood
  • Spray adhesive
  • Embellishments
  • Ranger paint dabbers
  • Masking tape
  • Craft knife
  • Ruler
The top horizontal line is the top of the dispenser.

I wanted to change the shape of the dispenser and personalize it so I bought a piece of Balsa wood. I measured the width of the dispenser and cut the balsa wood to fit. I then laid the dispenser on the Balsa wood and drew a line so show the top so I could see the real estate I had above the dispenser. I found the middle of the piece of wood and drew curves on the balsa wood so that my finished piece would have a cathedral feel. Using the craft knife I cut the curves.


Spray painting was next. I chose Krylon Fusion spray paint in black satin. Since the dispenser had a laminate coating, thought this would adhere best. Plus it dries super fast. I wanted bits of the black to show through around the edges of the paper. You could skip this step if you'd like.

I used masking tape to cover the cutting teeth to keep them sharp.

The spray painting turned out so well, that you might just want to stop here and embellish. I had already picked out scrapbooking pages that I loved so I just pushed on.
 

Using spray adhesive, I glued the paper to the balsa wood and cut off the excess. I repeated the process so that I had paper on both sides. Then I sanded it a bit.

Using the dispenser as a guide, I traced around the outside of both curved corners on the scrapbooking paper. I cut them out and using E6000 and glued the paper to the dispenser. Then I measured all of the other areas including the back wall of the dispenser. I then cut those pieces out of the paper and glued them with E6000 until I had all the white areas covered. (Remember to hold the paper in place for a bit. This glue needs time to set.)

I had some laser cut pieces and used a scrap of paper and glued it to them. Using a craft knife, I cut around the edges.
I used Ranger Paint Dabbers in Black to add a little contrast.

The back and embellishments were glued and I put books over them and let dry until the next day.

Then, just add your tape!


Monday, May 6, 2013

Haleighanna's Hands: SXSW and the Journaling Experience

In March, I attended the South by Southwest conference. I went to support my company but I also got the opportunity to support my own creativity.
I attended a session called, “Creativity—From a Pile of Rocks to a Work of Art” given by Josh Gosfield, a fine artist, author and award winning illustrator, photographer and art director. One of the most impactful points he made (and I am paraphrasing here) was about how to go about getting inspiration, “Keep an idea journal. Turn off screens! Daydream! Ask yourself 'what if?"
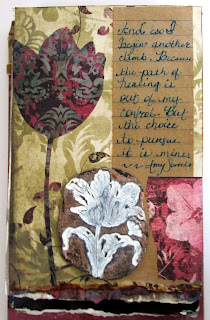
I couldn't agree more. For years, I have kept journals. Sometimes I use them to dream. Sometimes I use them to try a new technique. Sometimes I use them to process my world and experiences--the good memories and the bad, the unusual and the typical, the joyful and the painful. Below are just a few of my pages. 

I also used bits of paper from a sack from a popular store.
Loved the quote and used some scraps I had lying around.
 
 The medallion in the middle was a piece of polymer clay that I had rubber stamped into. It didn't make it into the intended piece, but it worked great here.
 
This was my second attempt at trying to express some of the regrets of my life. Sometimes once is just not enough.
 
The brown pieces were used as packing peanuts and I painted them. I like how they give a "prison" feel to the page.

A page to commemorate a walk on the beach with my husband.

Journaling can be used to mark the passage of your life or help you work out issues or experiences. What other ways do you use journaling? What has it taught you?
 

Monday, April 29, 2013

Haleighanna's Hands: DIY Coffee Filter Wreath Tutorial


Looking for a cheap way to show off some shabby chic spring flowers? This small and really affordable wreath will help you do just that without breaking the bank (i.e., I got a lot of my materials from the Dollar Store!).
 

Materials
  • Dollar store foam wreath
  • Straight pins
  • Masking tape
  • Coffee filters (lots)
  • Scissors
  • Glue
  • Brown paper bag or craft paper
  • Large plastic container
  • Towel
  • Acrylic paint
  • Utility or craft knife
  • Floral stems
Step 1: Tint your coffee filters

For the light pink flowers, I chose an acrylic paint and diluted it with water. There's no real formula to this--just squirt a quarter-size bit of paint and add water. Keep adding water but stop before it becomes transparent. Using the acrylic paint will ensure that you have the same color for each batch of flowers.

Immerse your coffee filters into the colored water. I do this in batches, leaving it for a few moments to really soak in. Then squeeze out the excess into the plastic container and lay the filters in a single layer on the towel. Let dry.

For the brown filters, I just used my left-over coffee.

Step 2: Create a back for the wreath (optional)

Take a piece of paper bag or craft paper that is large enough for the wreath to lay on. Add glue to the inner and outer rings of the floral foam. Then place the glue side on the paper. Let it dry. When it is completely dry, use the scissors or the craft knife to cut away the excess from in the inside and outside of the floral foam.


Step 3: Make the flowers

Taking two of the coffee filters (one pink and one brown), use the scissors to cut a spiral. This does not have to be precise. For the small flowers, I cut the two colored strands in half; for the large filters I leave them long. Get out the masking take and starting with one of the colors, start pressing the filter strand onto the tape.


As you do this, it will look like you are "gathering" or "pleating" the strand. Keep doing that until you run out of the strand. With the other color, start the same process a little below the first strand. Keep going until you run out of the strand.


If you are working on a large flower, grab a flower stem and place it on the tape and begin to wrap it around the stem. For the first quarter(ish) of the tape, wrap the tape on top of the tape--this will make a nice center for the flower. You can then start to wrap the tape a little higher on the flower to make it bigger. By the time you are done with the flower, you might be wrapping the tape around the edges of the coffee filter the row beneath the one you are working on. That's okay. Remember to trim the stem so that it is around 2 inches tall from the top of the flower to the end of the stem. Trimming the stem also cuts costs since you can get multiple flowers from a single stem.

For the smaller flower, I use a straight pin instead of a floral stem. It's the same principle, just a smaller version.


Step 4: Assemble the wreath

Take a large flower and put a little glue on the stem and the underside of the flower. Then push the stem into the floral foam. Randomly put large flowers around the wreath and then fill in with the smaller flowers. Let dry.


Some things to consider:
  • I suggest doing the flowers on the couch as you watch something on TV. You will be making a lot of flowers. I found that once I started this, I couldn't stop. It is addictive.
  • Make as many large or small flowers as you wish. The first time I tried it with all small flowers but the end result was too regimented for me. Different sizes of flowers add interest.
  • I like to add glue for each flower for just a little more support. This wreath should be handled some care, but not to worry. If a flower falls out, just add a little more glue and push it back in.
  • You can use teas to stain the coffee filters instead of paint. You won't get a consistent color from batch to batch but that's also a beautiful look.
 

Monday, April 22, 2013

Haleighanna's Hands: Making the Sausage

When you first start blogging, you do a lot of reading about how to write blogs. A couple of rules keep popping to the top. When you show the reader how to do something, you present a finished product with really great photos and clear, concise instructions. The other thing that you learn is not show how the sausage is made. A lot of people like sausage but no one wants to see how it is made. It's messy and probably pretty gross. The experts say that a blogger's audience doesn't want to see the struggle of creating. I would love to follow this advice, but I guess that's just not me.

A couple of weeks ago, I was asked to be in an art showcase. Incredible right? Little 'ole me? Well here comes the emotional sausage making so if you are squeamish, you can duck out now. The process is messy and somewhat gross.

There's been a lot of emotional turmoil in getting ready. Anxiety started sitting on my shoulder, whispering things in my ear. It sat on my chest and made it difficult to breathe. It squiggled around in my brain so decision making was difficult. Then excitement and optimism would try to take hold, but anxiety is strong and crafty. As I said, it was turmoil.


Joan Baez said, "Action is the only antidote to despair." So irrespective of the anxiety, fear, and frustration, I got off my butt. I used the anxiety to create some cool stuff (I think it's cool anyway). I used the really bad energy to force myself into a new direction. As an artist, welder, or golfer, what you envision in your mind is not always something that your hands can do. Usually that fear alone is enough to keep me from my studio. But in this instance, I had to let it go. I cannot explain why this situation is different, but it was. By the way, I have a new appreciation for the contestants on Project Runway; I think I get it now. There are times you have to make it work.
 

So, the show is about 48 hours away. I have one more piece to finish, a car to pack, an outfit to pick out, and probably a thousand things that I have forgotten to do. But, while it is emotionally messy and feels like a huge risk to take in public, I'm pretty sure that I wouldn't miss this for the world.

What have you done recently that seemed like a risk?


Monday, April 15, 2013

Haleighanna's Hands: Meet Some Really Cool and Talented Chicks called "Hang-Ups in KC"

With Spring here, craft fair season seems to be in full swing. So I packed up my handmade treasures (aka my stuff) and set up a booth in a local gym. While there were few buyers there, I did get a chance to meet some really cool jewelry chicks, Carolyn Adams and Kristi Jergensen. Together they are known as "Hang-ups In KC."

They were funny and kind. Carolyn saw me struggling with my table as I set up. I set it up too high and was lowering it (yes with all the stuff on it) when Carolyn saw it at this really weird angle and ran over to help. Once she got over the idea that I was probably just a little clumsy or "touched," we found out that we all had a lot in common (starting our own business, Etsy store, blogs, things that we found funny, etc.) Both chicks are talented jewelers and just a hoot. Exhibit A: the spoon bracelet I got from them for a mere $20.00!

They just started a new blog a few days ago. So, while you can't meet these great, albeit food obsessed ladies (food was like every fourth comment in our conversation), you can get to know them through their blog.

Jumping Off The Deep End – The Evolution Of Our Handmade Business


This past March Kristi and I happily traveled to sunny Ventura, California to our very first conference. Craftcation is a 3 day Indie business and DIY workshop conference designed to inspire, build entrepreneurial skills, and provide networking opportunities to like-minded handmade enthusiasts.  It was held at the Crowne Plaza in Ventura which is located on the beach (a definite plus since it was snowing AGAIN in Kansas City). Ventura is a gorgeous town with fabulous restaurants and fun shopping.  Of course Kristi and I managed to find several antique & thrift stores while we were there which made it even more fun for us. Click here to read more.

This is the pier where they decided to "jump off the deep end" and start their business.

Monday, April 8, 2013

Haleighanna's Hands: Barnabas Collins and the Most Peaceful Place on Earth

When I was a little girl, one of my earliest memories was watching the original Dark Shadows on television. I remember the thrill of being frightened by the Gothic eeriness of Collinwood while huddled behind my mother's legs as she napped on the couch. Watching the waves hit the Oregon coast, I realized just how much it formed my deep love of a rocky seacoast.

Last week, I travelled to Portland for a very short visit. There is something (besides the reminisces of campy, daytime soap operas with terrible writing and even worse special effects) that fills my soul with peace and serenity. I wanted to share some of this special place with you.

Waves crashing against the rocky coast, just like the opening of Dark Shadows
 
The coast outside of Oceanside, Oregon.

It was a perfect day for flying a kite. I was bundled up against the wind and these girls were barefoot.
 
Grandma and grandson braving the Oregon spring weather.
 
Gulls looking for a little food.


Oregon is really one of my favorite places on earth. What's your favorite place? Where are you the most peaceful? Why is it your favorite place?


Monday, April 1, 2013

Haleighanna's Hands: Going Where Others have Gone Before

My Saturday morning routine includes a Starbucks coffee and a few hours in a comfy chair at the Barnes and Noble looking at books and magazines and dreaming. Long before I took up a paint brush or scissors, I would look through magazines and dream about making art. Just like a teenage girls read Vogue and dream of being a supermodel, I would read and dream of being an artist (trust me, supermodel was completely out of the question).

I decided to share some of my favorite books and magazines that helped me find the courage to express myself through paper, paint, nails, and leftover cardboard boxes.

Somerset Studio

This was the first magazine that I picked up that showed me the incredible world of mixed media. I was immediately entranced. Somerset Studio provided instructions, ideas and focused on the beauty of writing and lettering. Every couple of months, I look forward to opening the covers and finding beauty and inspiration from some very talented artists. It also taught me about acrylic mediums, image transfers, and working on canvas.

Somerset Studio usually includes artist papers as a free gift.

Cloth Paper Scissors

Packed with lots of ideas and a clean layout, this bi-monthly magazine is a fantastic resource. It focuses a little more on quilting, fabric, and alterative materials such as Citra Solv. The first time that opened the pages, I saw a container made out of used dryer sheets, metallic flakes and other fibers. I was hooked. Cloth Paper Scissors gives clear instructions and is really inviting.

Unfurling

My drawing skills leave a lot to be desired; in fact it's one of the reasons that I chose to express myself through collage and mixed media. Misty Mawn's Unfurling gave me the tools and the push I needed to help me overcome the fear of trying to draw. The book is informative and beautiful to look at. I love how the instructions are written so simply that even I get them each time I pick it up, I am eager to get back to my own work.


The Art of Personal Imagery

I started my artistic journey in high school when I began crafting programs for our high school plays. I picked up several years later when someone at my company needed a retirement scrapbook. At that point, scrapbooking was all matted photos and stickers (oh baby have we come a long way). When I got this book and saw that author Corey Moortgat  had actually painted on pictures, I think I gasped. When I recovered from the shock, I thought it was one of the coolest things that I had every seen. I recommend this book if only to jolt you into a new way of seeing possibilities.

Great examples and descriptions of unifying a composition.

Taking Flight

This is a fantastic step-by-step book on how to create layers in your composition. Paper, paint, and modeling medium, are used to create more interesting and textured backgrounds. The book has an encouraging and spiritual bent. Her faces and bodies are exaggerated but I think that's why I love them so much.


As I have said before, I need lots of inspiration. Looking at others' work or trying to deconstruct what they did, helps me solve the problems that I am having in my own work. It's an influence and a kick-start to my own process.

What books or magazines do you read? How do you get your creative juices flowing?